Welcome to the start of your NWU journey! To help you register smoothly and confidently, follow these 9 simple steps. You’ve got this – and we’ve got you.
Registration for first-year students start on 19 January. All registrations are online.
- You must have received and accepted your final offer from NWU to proceed with registration.
- NWU accepts one application per academic year. No late applications or walk-ins are accepted during the registration period.
- If you missed the application deadline, you can register with the Central Applications Clearing House (CACH) to be considered by other institutions with available space: https://www.gov.za/services/central-applications-clearing-house
Step 1: Set Up Your NWU Email Address
Once your status shows “Registration Ready” on the application portal, create your official NWU email address. You’ll use this to receive all university communication and access key systems.
- To activate your email address:
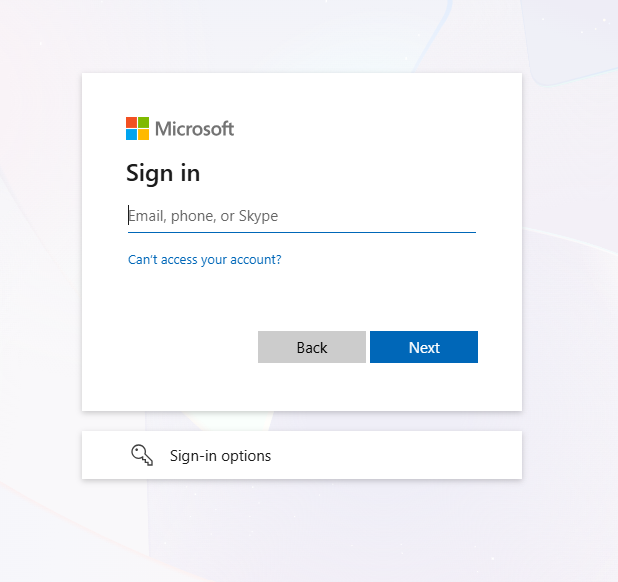
- Go to Microsoft Outlook: https://365.ms.nwu.ac.za/
- Sign in with your NWU email address which is your 8-digit student number, followed by “@mynwu.ac.za”.: 12345678@mynwu.ac.za.
- Your first password is your 13-digit identity number OR passport number followed by @Nwu, e.g.: 20250120019083@Nwu.
- Choose “Work/School” account, then select “Active Directory”
- Note that the e-mail will only be available after 48 hours.
- Setting up multifactor authentication (MFA) for Microsoft 365 - contact IT services if you encounter problems setting up MFA
For help, read or download this infographic!
Helpdesk contact number: 018 299 2700
Step 2: Log In To Your Student Portal To Start The Registration Process
Tip: Please ensure that your browser settings permit pop-ups and that cookies are enabled. The registration screen opens in a new window, and both cookies and pop-ups must be active for the process to function correctly.
Open the NWU Self-Service Portal in your browser and click on “Student Portal Homepage” to log into your profile.
For help, read or download this infographic!

Log in using your Student Portal (MySIS) credentials:
- Username: NWUstudentnumber@mysis-nwu.ac.za
- Password: were sent to both your NWU email account AND the email account you used when you applied to the NWU.
Please note:
- Do not open multiple versions of the Student Portalon a single screen or device, as the portal may remember your previous login, which could cause issues.
- If you are currently signed in with another Microsoft account, this may interfere with your Student Portal login. Using the incorrect account will result in being logged out automatically.

Step 3: Pay Your Minimum Fees Payable
Visit the Student Accounts and Bursaries webpage for the compulsory first minimum fees.
There are two options you can follow when paying your minimum fees and student account:
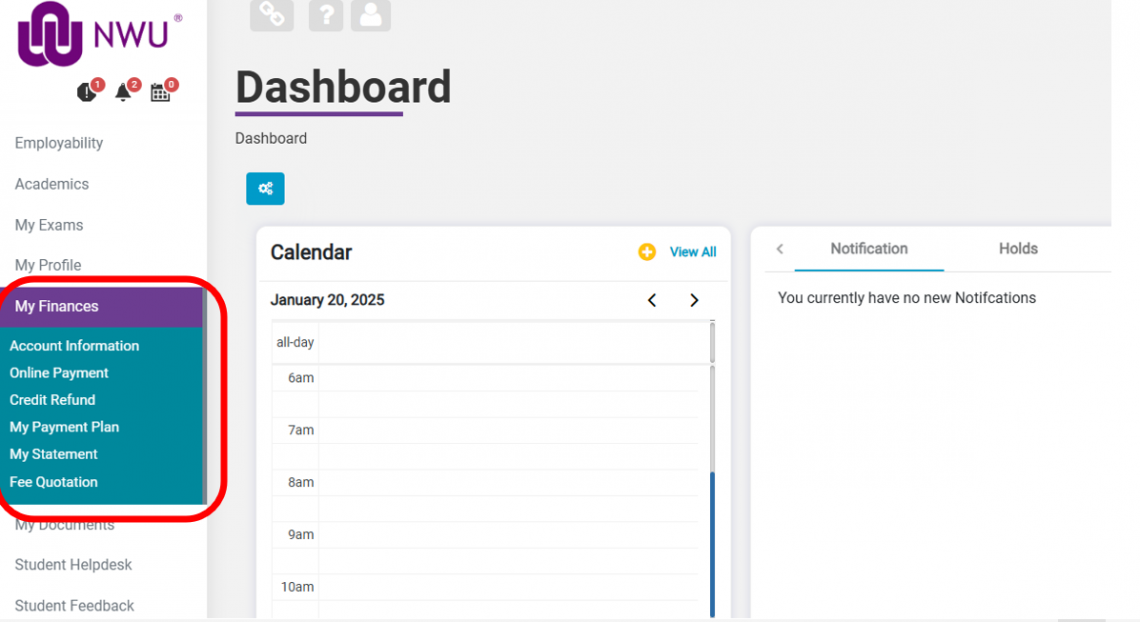
1. Student Portal
- Log in to the Student Portal by using your login credentials (as was explained in Step 2).
- Choose the “Online Payment” option to proceed.
2. Payment Portal
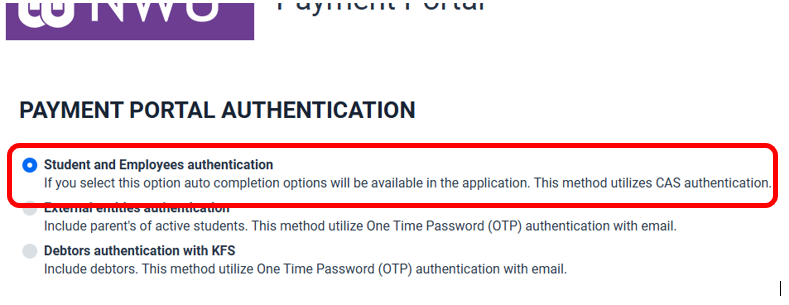
Visit the Payment Portal, and select the “Student Account” to pay you minimum fees.

- Under “Payment Portal Authentication” select the option “Student and Employee Authentication”, see below:
REMEMBER!
- If you are a cash-paying student, you must use your 8-digit student number as your reference number when paying the minimum fees.
For help, read or download this infographic!
Step 4: Upload Financial Documents
**The following step is only applicable to bursary and loan funded students who are required to upload supporting financial documentation.
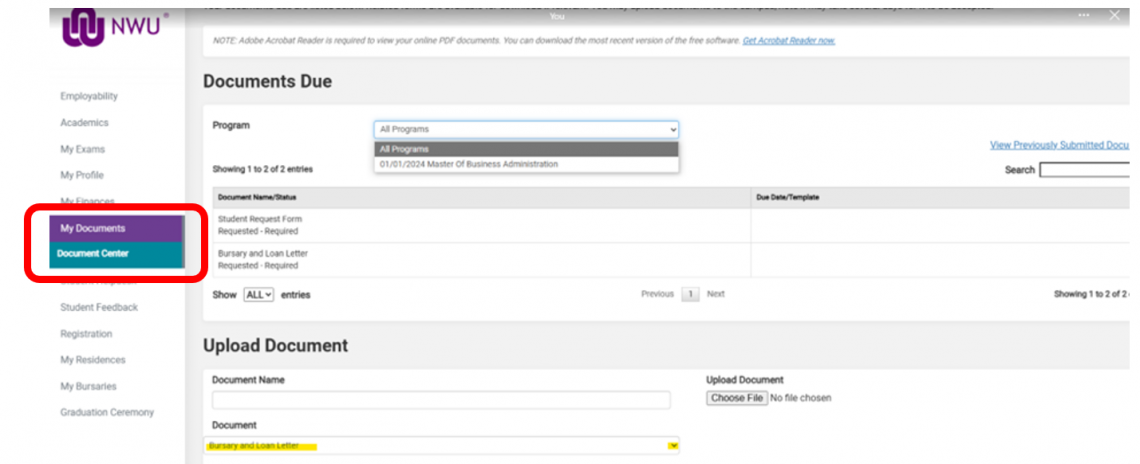
To upload financial documentation, such as bursary and loan letters:
- Log in to the Student Portal.
- Go to the “My Documents” > “Document Center” to upload:
- Bursary letters
- Loan letters
- Travel allowance info
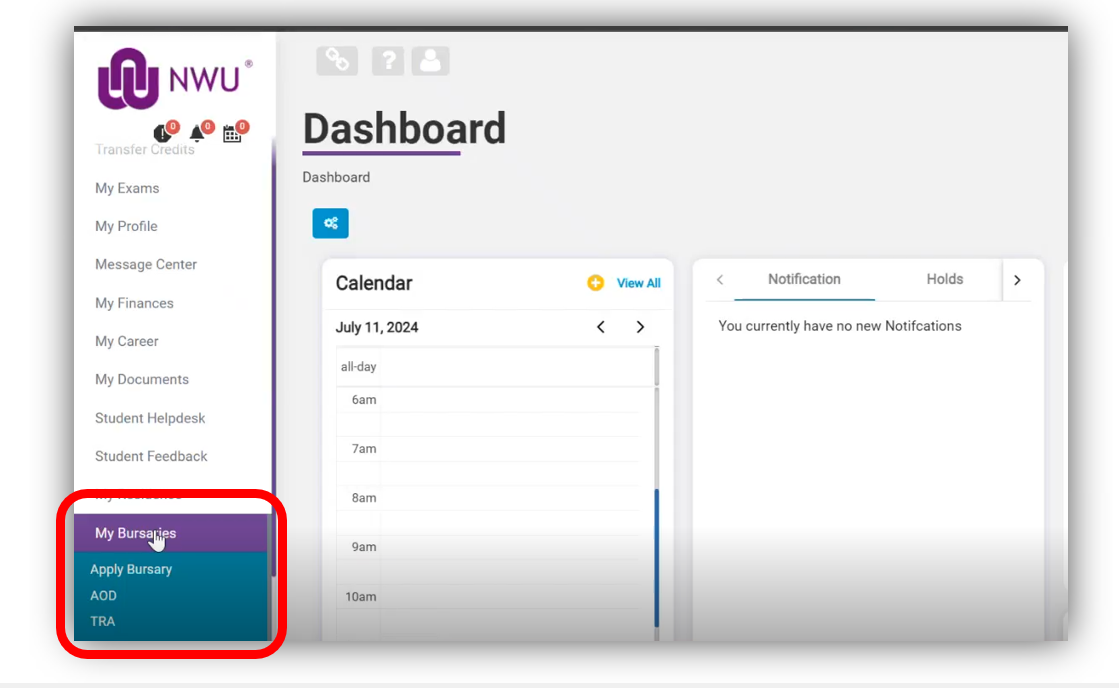
NWU bursaries
- You can apply for NWU bursaries by accessing the “My Bursaries” tab.
- The following NWU bursaries must be applied for by the student on the Student Portal:
- Leadership (school head boy/girl) [First-year students ONLY]
- Arts & Culture [First-year students ONLY]
- Family Discount
- Orphan
- Foster Care
- Disability
- The following NWU bursaries are automatically applied to the student account, therefore no application is required:
- Academic merits
- Honours (1 year)
- Master’s (3 years)
- Doctoral (4 years)
Acknowledgement of debt (AOD) [returning NSFAS sudents only]
- Only returning NSFAS students with outstanding debt are eligible to sign an AOD to register.
- The AOD can be accessed under the “My Bursaries” tab, via the “AOD” tab on the Student Portal.
Travel allowances (TRA)
- Travel allowances are accessed via the “TRA” button.
- Students eligible for travel allowances should submit their request here, where they will be guided by the system on the information and lease agreement they need to submit.
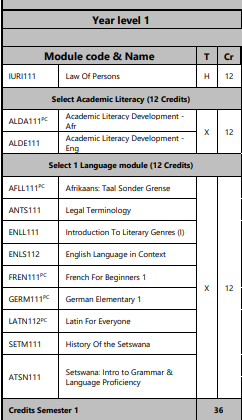
Step 5: Review Your Faculty’s Yearbook
- Visit the yearbook webpage and click on the yearbook for your chosen faculty.
- Find your qualification (e.g. Bachelor of Social Work) and read through Year Level 1 to see the core and elective courses (modules) for your first year.
- Take a screenshot of the courses for your year 1 and keep it close by for when your register.

Step 6: Registration
Take note: Understanding registration holds
During the registration process, you might see a “registration hold” on your account. This indicates that specific administrative, financial, or academic requirements must be met before you can finalise your registration for the year. See what it means and what to do.
- Log into the Student Portal, and click on “Registration” tab in the left-hand menu and again on Registration.
- The Curriculum-Based Registration window will open. Please ensure that your pop-up blocker is not activated.

Important! Disable the pop-up blocker on your browser
Deactivate pop-up blocker: When you access the registration page on the Student Portal and the pop-up blocker on the browser you are using is activated, a notification will appear towards the top of your screen. Click on this notification immediately and follow the options to disable the blocker.
If the notification doesn’t appear or you prefer adjusting your settings manually, follow these steps to adjust your browser settings:
- Click on “Settings” and then the “More” icon (three dots) at the top-right corner of your browser.
- Select “Settings” from the dropdown menu.
- In the left-hand menu, select “Cookies and Site Permissions”.
- Under “All Permissions”, choose “Pop-ups and Redirects”.
- In the “Allow” section, click “Add”. Type/copy the URL of the registration page (https://siscurriculumplan-100997.campusnexus.cloud/registration/) into the dialog box, then click “Add”.
Once you’ve added the URL, it will appear in your Allow list, enabling pop-ups for the Student Portal registration page.
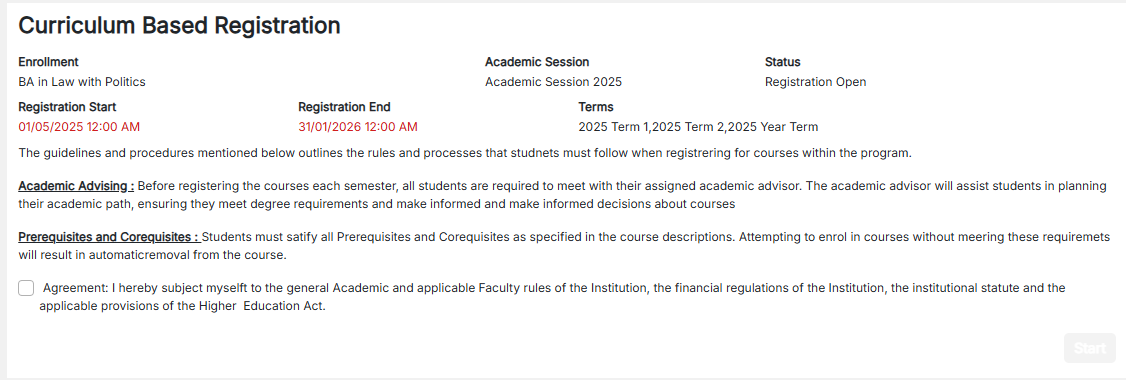
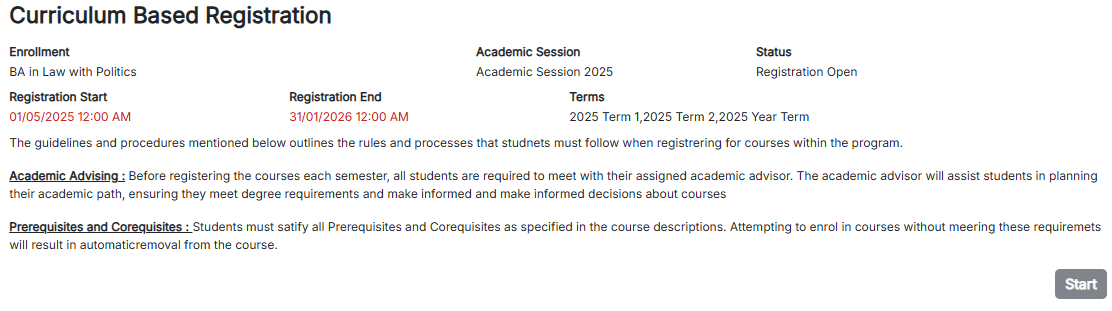
#2 Course registration policy
Carefully read through the terms and policies before you click to Accept. Pay attention, because this is a commitment you make with the North-West University. After you accept the conditions, a “Start” button on the right side of the screen.
#2 Course registration policy
Carefully read through the terms and policies before you click to Accept. Pay attention, because this is a commitment you make with the North-West University. After you accept the conditions, a “Start” button on the right side of the screen.

#3 Course offering
When you arrive on the “Course Offering” page this is where you will select the courses for your programme version. You will also see the short description of each course (for example: AKLR123 = Ancient Rome and other cultures). See below example:

Selecting and Registering Your Courses
When registering, the list of courses (modules) for your qualification will appear in a table format. Please read each category in the table carefully.
As you work through your registration, you’ll notice the status of each course will update from:
- “Future” → when the course is not yet selected
- “Selected” → once you’ve chosen the course
- “Submitted” → chosen course is being processed for registration. Please note that no action can be performed during this status.
- [“Paused” → this status will only show if there is any system error or exception during processing. Please note that no action can be performed during this status.]
- “Registered” → course registered successfully

How to Select a Course
Click the green icon in the far-left “Action” column next to the course name.

A pop-up window will open, showing the campus, the scheduled days and times for lectures, the lecturer’s details, and any course prerequisites or co-requisites (displayed on the far left of the screen).
- Tip: Pay careful attention to class schedules to avoid timetable clashes.
To register, click the green icon on the far-right within the pop-up window. Once selected the window will close, the icon will turn red, indicating that the course has been added to your registration list.


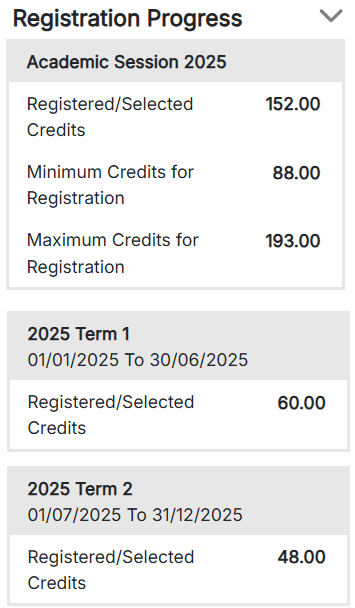
Check your progress
At the bottom right, you’ll find a “Registration Progress” bar that tracks:
- The number of credits you need to complete for the year to finish your qualification in the allotted amount of time.
- Minimum and maximum credits for the year
Make sure your selection meets the credit requirements before submitting your registration.
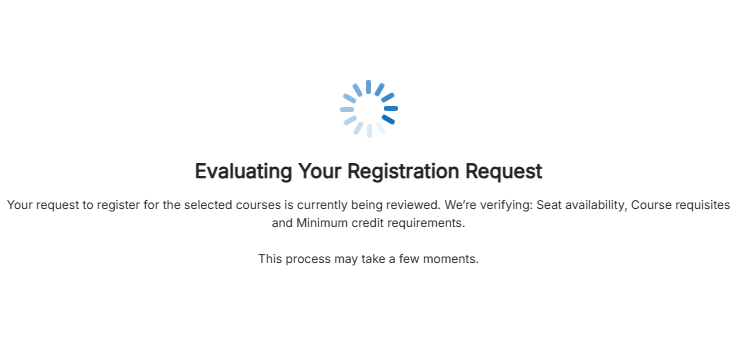
Submit Your Registration
Once you have selected everything, click Submit. The portal will evaluate and complete your registration. Click “Close”, you will be returned to the “Course Offerings” dashboard.
Click “Start” again to refresh the page. Your selected courses will now show the status as “Registered.”


Unregistering a Course
Once registered:
- Students can remove a course by clicking the “Unregister Course” icon next to each registered course and “Unregister” within the pop-up window and “yes” to complete the process.


Step 7: Download your proof of registration
- Log into the Student Portal, and open the Registration Tab. Ensure your registration is complete and modules selected.
- Click “Proof of Registration” and from the dropdown menus, select your course and study year (e.g., 2026).
- Click “Generate” and your PoR will download as a PDF.
Step 8: Check Your Class Timetable
Find your class timetable in 4 easy steps
Your personalised class timetable is built using your Proof of Registration (POR).
- Download your POR from the Student Portal and note your course codes (e.g. POLI112).
- Go to the 2026 Class Timetables page: https://studies.nwu.ac.za/studies/class-timetables and select your campus.
- When the CelCat timetable will open, select “Groups” from the “Type” drop-down menu.
- In the “Resources” field, enter the course codes of your first semester courses (for example: POLI112, ECON112) one by one to build your weekly timetable.
Need help? Use the official Celcat navigation guide or contact your campus timetable office.

Step 9: Explore the student portal
The Student Portal is where you can track your progress, view your finances, documents, class resources, calendar, and so much more. Refer to infographic on how to navigate the Student Portal.
This is also where you can find the Student Helpdesk, where you can download your student records, submit requests and report issues relating to assessments, results, graduations, IT support, etc.
By this point, you have had to process a lot of information. If you are feeling overwhelmed, please make use of our Registration Navigator. This handy tool will take you through all the helpful hints, registration steps and available resources with added extras to guide you through this journey.
Visit the Registration Navigator!